| previous - contents - next |
As you have seen, SuperMemo is a very powerful program. It is also very versatile. One of the most striking features about SuperMemo is that you can change how questions are asked and answers are given (indeed, even what constitutes a question and an answer). SuperMemo accomplishes these tasks through templates. These are very powerful concepts that may be unfamiliar to you and we encourage you to experiment with templates to become familiar with them. Remember that the simplest representation of items in a SuperMemo database is the familiar flashcards that we used as children. Well, a flashcard has two sides. But what goes on each side? SuperMemo lets you specify up to ten paragraphs for each side of the card. Within those ten paragraphs, you can add your own text or use the contents of one of the six fields you named in each database category. You can even specify the font, layout, margins, colors etc. of each of the ten paragraphs on each side of the card. Each database category has its own template. The template determines the appearance of all cards in the category. To open the template editor, you can tap the Template button in the Edit Card screen. The template editor allows you to control the content of each paragraph and its font, colors, indent and justification. Of course, if you are content with the standard look of the cards, you do not need to care about templates at all. Otherwise, more details follow in these sections: |
 |
|
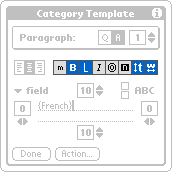
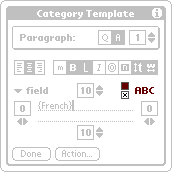
Cards are used to display database items. Each card has two sides: question and answer. Each card side can have up to 10 paragraphs of text. You can design these paragraphs in the template editor screen. The first thing you have to do is to select the paragraph you want to design using the main control on the template editor screen, the paragraph selector. Use the two Q/A buttons to select either a question or answer side and use the little arrows on the right of the box showing the paragraph number to select the desired paragraph. If you want to quickly select the first paragraph, just tap the paragraph number and it will be set to 1. Note that you can always edit only one template paragraph at a time. |
 |
|
For each paragraph you can select the font in which its text will be displayed in the card view. For this, use the font selector bar. The font selector bar consists of 8 buttons with the following meanings:
|
 |
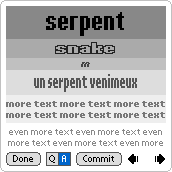
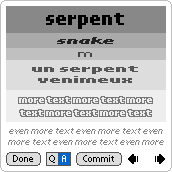
These three screens show just some of the possible 256 font combinations. |
 |
 |
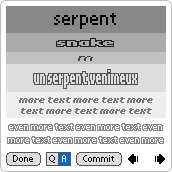 |
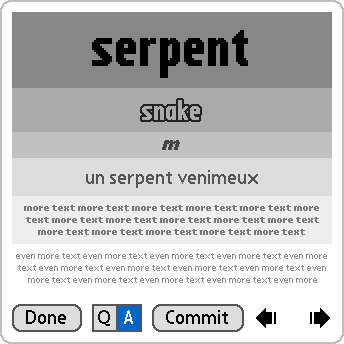
This screen shows font example on a high-resolution display. Note the last two paragraphs with "more text" and "even more text" that use minifonts. A minifont is a half-size font and is only available on high resolution handhelds. |
 |
|
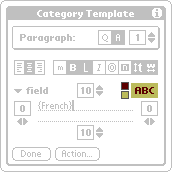
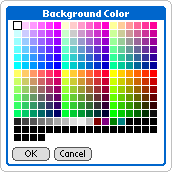
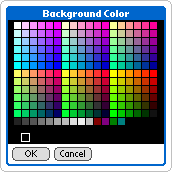
For each paragraph you can select text color and background color. Tap one of the small color buttons to pick the colors. The upper button is for text color, the lower button for background color. Next to the small buttons you can see a sample ABC text in the colors you have selected. You can also tap this sample text to pick both the text and background colors. |
 |
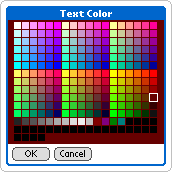 |
The color picker screen displays the available system color palette of your handheld. If you want to select white color, tap the white color square (the first one). If you want to select black color, tap the black color squre (the last valid color). |
 |
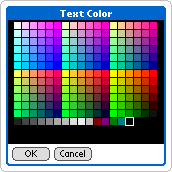 |
If you select any empty color slot after the last one (black), it will mean "no color". Paragraphs that use no user-defined color will display in system colors. This can be black for text and white for background, or some other colors, depending on your system color scheme. The system color scheme can be selected in the built-in Prefs application. |
 |
 |
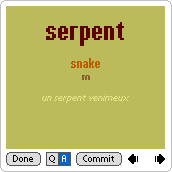
Tip: If the displayed card is shorter than the screen height, the background color of the last paragraph defines the color of the rest of the card. Here you can see three examples of the same card with different color templates. |
 |
 |
 |
|
Each paragraph can be either left justified, right justified, or centered. Select the desired justification using the three buttons left from the font selector bar. You can also add a space left, right, above and below the paragraph. For this, use the four number boxes with the little arrows. The number denotes the space in pixels, which are the tiny dot elements on the display of your handheld). The larger the number the bigger space. If you want to quickly set any of the four spaces to zero, just tap the number in the box and it will reset its value instantly. |
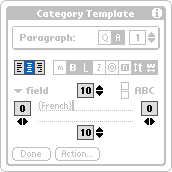 |
|
The most important part of the paragraph setting is its text content. Anything that you write into the field will appear on every card in the category. It is useful for designing headers or creating question sentences. Using this feature, you will not have to repeat the caption or question on every card, which will save you time and memory space as well. Besides the plain text that will be displayed on the card verbatim, you can enter special field tags that will be replaced by actual field values when displayed on the card. The field tag is the name of the field placed in braces. You can paste these tags easily using the field selector. You can mix the field tags with plain text. For instance, if you create a paragraph with a question text What is "{English}" in French?, the card will display What is "memory" in French? on one item and What is "snake" in French? on another. Of course there can be more field tags in one paragraph if you want to. For instance, you can create a paragraph with an answer text such as 'The capital of {Country} is {Capital}.' On the actual card, the text will then be displayed as 'The capital of France is Paris.' or 'The capital of Spain is Madrid.' for instance. |
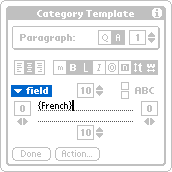 |
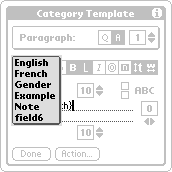 |
|
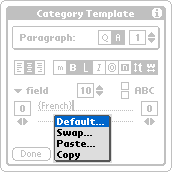
If you are lost in your template editing and your template does not work properly, or if you want to start building a template from scratch, tap the Action button and select Default. When you confirm the dialog, all current template settings will be discarded and replaced with their default values. |
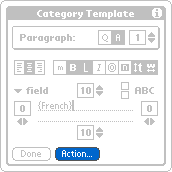 |
 |
|
You can copy templates between categories using clipboard. SuperMemo uses a dedicated template clipboard that allows you to store one template in it. Available template clipboard commands are Copy, Paste and Swap and you can get to them by tapping the Action button. |
 |
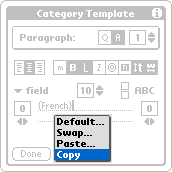
1. Copy: If you want to copy a template, you need to use the Copy command first. Open the template you wish to copy, tap the Text button and select Copy. This will copy the whole template to the clipboard. Then you can use the invisible contents of the clipboard with Paste or Swap commands explained below. |
 |
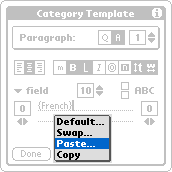
2. Paste: The Paste command will copy the contents of the clipboard to the current template. It will overwrite and replace the original template. To copy a template from one category to another, you will use the Copy and Paste commands together. First find the source template and use Copy. Then open the tagret category, go to its tamplate and use Paste. |
 |
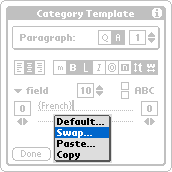
3. Swap: This will exchange the contents of the clipboard with the current tempalte. The template that was in the clipboard will become the active template the previously active template will be in the clipboard. |
 |
|
|
© MapleTop Software |
|
|